Category: Knots

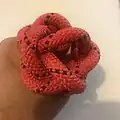
  • Chinese button knot

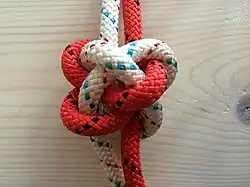
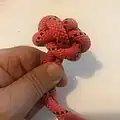
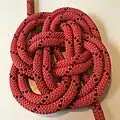
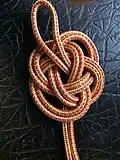
    Chinese button knot
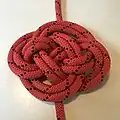
    Chinese button knot

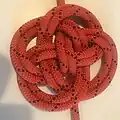
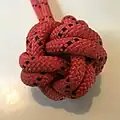
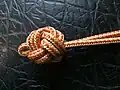
    tightened Chinese button knot
    Category Decorative
    Category 2 Stopper
    Related diamond knot, Celtic button knot
    Typical use clothing button
    ABoK #599

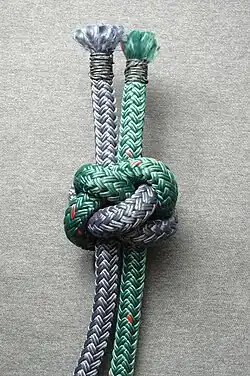
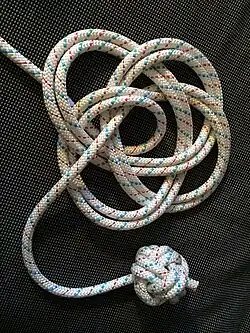
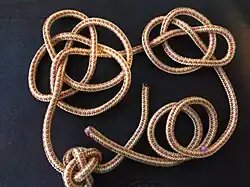
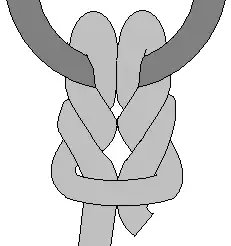
    The Chinese button knot is essentially a knife lanyard knot where the lanyard loop is shortened to a minimum, i.e. tightened to the knot itself. There emerges therefore only two lines next to each other from the knot: the beginning and the end. The knot is commonly used as a button on underwear and night clothes in China, as they are more durable than harder buttons, and more comfortable to rest against.[1]

    Tying

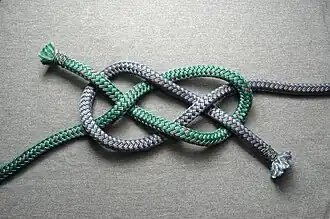
    The basic chinese button knot (ABOK #599 on one string) is usually tied with a carrick bend that attaches the two ends as a first step. This results then in a knife lanyard knot (ABOK #787) where the loop part can be sized and used as a button hole, while the knot part can be used as a button.

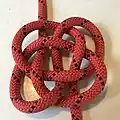
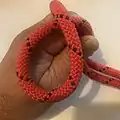
    • Tying starts  with a diagonal carrick bend (two colors for clarity)
      Tying starts with a diagonal carrick bend (two colors for clarity)
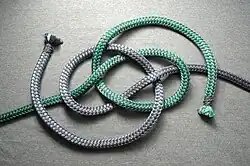
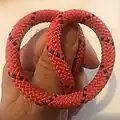
    • Ends continue around and over the standing part on the other side
      Ends continue around and over the standing part on the other side
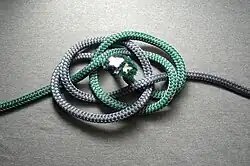
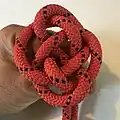
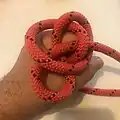
    • Ends under the knot and up through the middle hole together
      Ends under the knot and up through the middle hole together
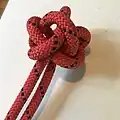
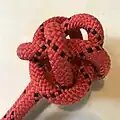
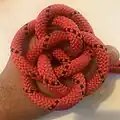
    • Tightened to a spherical basket weave, ends opposite standing parts
      Tightened to a spherical basket weave, ends opposite standing parts

    Below is the ABOK description, and several video demonstration references: [2][3][4]

    To tie the button: Take a piece of banding about three feet long, middle it, and lay it across the left hand as pictured. Take the end from the back of the hand and make a right turn around the tip of the left thumb. Bend the left thumb and hold the turn against the standing part of the cord. Take the left end and tuck it to the right, under the first end and then to the left under the upper center part of the knot. The knot should now have a regular over-one-and under-one sequence throughout.
    Still keeping the knot in hand, tuck both ends under the rim and up through the center compartment of the knot as pictured in the
    third diagram.
    Remove the knot from the hand, turn it completely over, and allow the two ends to hang down between the two middle fingers of the left hand as drawn in the fifth diagram. Work out the surplus material of the loop without distorting the knot and arrange it…

    The Ashley Book of Knots[1]


    There is however a tying method that does not require a carrick bend, rather a slip knot as a first step, and does not produce a lanyard loop that needs to be reduced when used as a button. This method provides just the button, a spherical basket weave knot, in the style of Turk’s head knot.

    • Starting with a slip knot with the slip end at top right.
      Starting with a slip knot with the slip end at top right.
    • The slip end over the left side up and through slip for 2 symmetrically interwoven slips.
      The slip end over the left side up and through slip for 2 symmetrically interwoven slips.
    • One of the ends continues to bend and is pushed down the nearest triangular hole at center
      One of the ends continues to bend and is pushed down the nearest triangular hole at center
    • The other end continues to bend and is pushed down the other triangular hole at center
      The other end continues to bend and is pushed down the other triangular hole at center
    • The resulting flat flower has 4 symmetric petals and two stems
      The resulting flat flower has 4 symmetric petals and two stems
    • Tightening like an umbrella (not like a wine glass), and pulling the middle out
      Tightening like an umbrella (not like a wine glass), and pulling the middle out
    • With the middle point at top, it becomes a 9 bulge sphere.
      With the middle point at top, it becomes a 9 bulge sphere.

    A third way to tie this knot [5] starts with two loops almost like tying the celtic button knot, except for the curvature change at the center which results in the way the ends exit the knot; at opposite sides for celtic, at the same side here.

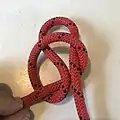
    • one overhand loop
      one overhand loop
    • another partially overlapping underhand loop behind
      another partially overlapping underhand loop behind
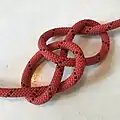
    • third loop bends back an weaves
      third loop bends back an weaves
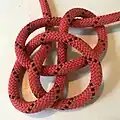
    • fourth loop completes the symmetry
      fourth loop completes the symmetry
    • the middle point at top pulled out
      the middle point at top pulled out
    • tightened to a 9 bulge sphere
      tightened to a 9 bulge sphere


    The resulting knot in both tying methods (slip-knot method and two-loops or WhyKnot method) is ABOK #600 which is similar to knife lanyard knot but the loop part is reduced to the top center bulge on its surface.

    “The top center part of the present knot has retreated from the surface. This should now be forcibly pricked to the surface and the surrounding parts tightened to hold it in place. This is the final form of the common chinese button knot. By counting it will be found that the knot has 9 surface parts.”

    Which triangular hole at the S formed/back bent top center each end is tucked through in both tying methods makes a difference:

    • tucking through the one at near side of the center as indicated by red lines in this image gives ABOK #600 the 8 part knot, of which the common chinese button knot is a version with a 9th surface part,
    • tucking through the one at opposite side as indicated by red lines in this image gives ABOK #787 the knife lanyard knot but with a retreated loop.
    • Chinese button knot Doubled ABOK #601 flat, with one end from outside all the way
      Chinese button knot Doubled ABOK #601 flat, with one end from outside all the way
    • Chinese button knot Doubled ABOK #601 flat, with one end from outside all the way, ends passing each other before reversing
      Chinese button knot Doubled ABOK #601 flat, with one end from outside all the way, ends passing each other before reversing
    • Chinese button knot Doubled ABOK #603 flat, with each end from following from outside
      Chinese button knot Doubled ABOK #603 flat, with each end from following from outside
    • Chinese button knot Doubled ABOK #601 tightened version
      Chinese button knot Doubled ABOK #601 tightened version

    See also

    • Tangzhuang, a jacket which often incorporates knotted buttons

    References

    1. 1 2 Ashley, Clifford W. (1944). The Ashley Book of Knots, p.101. Doubleday. ISBN 0-385-04025-3.
    2. How to Make a Diamond Knot (Lanyard Knot) by ProfessorParacord via YouTube
    3. The Paracord Weaver: Chinese Button or Lanyard Knot via YouTube
    4. 徒手鈕扣結-初級基本結【一線生機】 (Button Knot) via YouTube
    5. How You Can Tie The Chinese Button Knot -by whyknot via YouTube
    6. Ashley, Clifford W. (1944). The Ashley Book of Knots, p.103. Doubleday. ISBN 0-385-04025-3.


    This article is adapted from “Chinese button knot” on Wikipedia, written by its contributors, and used under CC BY-SA 4.0. Text on this page is available under the same licence. Source snapshot: Wikipedia via Kiwix, 2026-07-20.
  • Shroud knot

    Shroud knot
    Shroud knot
    Category Bend
    Typical use joining two ends of rope
    Caveat less secure than a full splice
    ABoK 1565

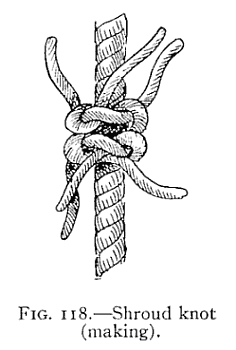
    The shroud knot is a multi-strand bend knot used to join two ends of laid (or twisted) rope together.

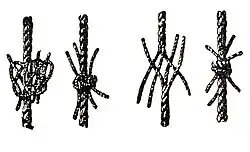
    Shroud knots, in general, are a class of knots in which the individual strands of laid rope are knotted, but not woven, to the individual strands of another laid rope. This makes them more secure than a simple bend but less secure than a full splice; however, they use less rope than a full splice would. The most common form of shroud knot involves two interlocking wall knots.[1]

    The name “shroud knot” refers to the shrouds connected to a ship’s mast.[2] If a shroud was shot through, the shroud knot provided a way to quickly repair it using minimal rope. As modern ships now use steel cable for the most part, the knots are now more often used decoratively than functionally.[1]

    Shroud knot
    Several types of shroud knots (two simple and two double ones)

    References

    1. 1 2 Blandford, Percy W. (11 June 2012). Practical Knots and Ropework. Dover Publications. ISBN 9780486148656. Retrieved 17 February 2023.
    2. Gibson, Charles (1996). Handbook of Knots and Splices, and Other Work with Hempen and Wire Ropes. Barnes & Noble Books. ISBN 9781566197717. Retrieved 17 February 2023.

    See also


    This article is adapted from “Shroud knot” on Wikipedia, written by its contributors, and used under CC BY-SA 4.0. Text on this page is available under the same licence. Source snapshot: Wikipedia via Kiwix, 2026-07-20.
  • Shoelace knot

    Shoelace knot
    Shoelace knot
    Names Shoelace knot, Bow
    Category Binding
    Category 2 Loop
    Related Reef knot
    Releasing Non-jamming
    Typical use Tying shoelaces, bow ties, decorative bows
    ABoK #1212, #2403, #2404, #2411
    Shoelace knot
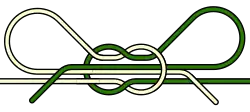
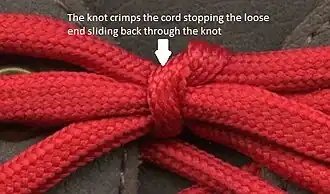
    Close-up of a shoelace knot.

    The shoelace knot, or bow knot, is commonly used for tying shoelaces and bow ties.

    The shoelace knot is a doubly slipped reef knot formed by joining the ends of whatever is being tied with a half hitch, folding each of the exposed ends into a loop (bight) and joining the loops with a second half hitch. The size of the loops and the length of the exposed ends are adjusted when the knot is tied. It has the stability of the reef knot but is significantly easier to untie, simply by pulling the ends away from the center of the knot.

    The loops are sometimes referred to as “bunny ears”, especially when the knot is taught to children.

    Techniques

    There are several ways to tie a shoelace knot; each starts with the tying of a half hitch, and requires attention or some habitual mechanism for arriving at a knot that is an elaboration of the reef (or square) knot rather than of the granny (or lubber’s) knot. If the bow is horizontal across the opening the bow is correctly and securely tied, but if vertical is likely to slip. One approach is to start by taking, in each hand, the end of the lace that emerges from the uppermost eyelet on that hand’s side of the shoe; then passing the dominant hand’s end under the other end, from front toward back, and dropping each lace on the opposite side from where it started; and in the finishing step again grasping the lace on each side with the hand on that side (perhaps taking time to note that because each end crossed over the shoe before, the laces have switched hands  or vice versa, the hands have switched laces) and again passing the dominant hand’s end under the other end, from front toward back.

    • The simplest approach to describe is to also form a loop by bending each lace end back toward the closest part of the same lace, then join the two loops in another half hitch, in the second passing-back-under described before these bullet points.
    • Another common procedure (especially for bow ties)[1] is to form a loop at one of the ends of the initial half-hitch, and circle it with the other end, which is simultaneously folded into a second loop that is then pushed through the knot.
    • The quickest approach is said to be one involving making one loop between the thumb and forefinger of each hand, and pulling each loop through the other; speed probably requires acquisition of muscle memory via repetition that is guided by a sequence of images.[2]

    More secure shoe-tying knots

    A variation of the procedure involves looping the top part of the knot twice instead of once, resulting in a finished bow of almost identical appearance but with the laces wrapped twice around the middle. This Double Slip Knot holds the shoelaces more securely tied while still allowing them to be untied with a (slightly firmer) pull on the loose end(s).[3] One variation, the subject of a U.S. patent, begins with a surgeon knot and has an upper double slip knot on top of that.[4] Lace locking can be added for additional security.[5]

    A less secure shoe-tying knot

    Tying two consecutive right-over-left half knots (or two consecutive left-over-right half knots) produces, instead of a square-knot-like bow-knot, a much less secure version corresponding to the granny knot.[6] This version will also produce asymmetrical slips; one pointing down, the other up.

    The corset bow

    Just as it is possible to stack a number of half hitches to create a longer knot  remembering the reverse direction each time  which is equivalent to tying one reef knot on top of another, so bows which need to reduce long lengths, such as corset tapes, can be tied on top of each other, slipping every other layer.

    Shoelace knot
    Sketch showing a Double Slip Knot tied incorrectly by basing it on the granny knot instead of the reef knot

    References

    1. “How to Tie a Bow Tie”. WikiHow. Archived from the original on 28 July 2014. Retrieved 24 July 2014.
    2. “Ian’s Shoelace Site  Ian Knot, Ian’s Fast Shoelace Knot”. www.fieggen.com. Archived from the original on 2013-01-15. Retrieved 2013-02-03.
    3. Ashley, Clifford W. (1944). “Knot #1219”. The Ashley Book of Knots. Doubleday. p. 221. ISBN 978-0385040259. {{cite book}}: ISBN / Date incompatibility (help)

    4. US patent 5997051, Kissner, Paul J. & Kissner, Marjorie, “Shoelace tying system”, published 12/07/1999 
    5. “Ian’s Shoelace Site  Lock Lacing”. www.fieggen.com. Archived from the original on 2015-05-15. Retrieved 2015-05-13.
    6. Ashley, Clifford W. (1944). The Ashley Book of Knots. Doubleday. p. 75. ISBN 978-0385040259. {{cite book}}: ISBN / Date incompatibility (help)

    External links


    This article is adapted from “Shoelace knot” on Wikipedia, written by its contributors, and used under CC BY-SA 4.0. Text on this page is available under the same licence. Source snapshot: Wikipedia via Kiwix, 2026-07-20.
  • Chain sinnet

    Chain sinnet
    Chain sinnet
    Names Chain sinnet, chain sennit, chain shortening, chain stitch, chain braid, caterpillar sinnet, crochet stitch, daisy chain, monkey braid, single trumpet cord, single bugle cord
    Releasing Non-jamming
    Typical use Shortening rope or cable for use or stowing
    ABoK #1144, #1145, #2868
    Instructions

    A chain sinnet (or chain sennit) is a method of shortening a rope or other cable while in use or for storage. It is formed by making a series of simple crochet-like stitches in the line.[1] It can also reduce tangling while a rope is being washed in a washing machine.

    Tying

    Chain sinnet
    Tying steps two and three in progress

    To tie:

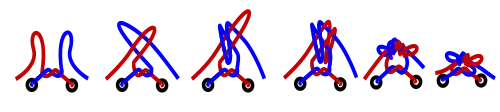
    1. Create a loop in the rope. Then pull a bight of the working part through the loop, creating an overhand noose knot.
    2. Pull another bight of the working part through the loop of the previous stitch.
    3. Tighten the stitch to the desired degree by pulling on both sides of the loop. Adjust the loop by pulling on the working end to keep it a reasonable size.
    4. Repeat steps 2–3 until the rope has been sufficiently shortened.
    5. To lock the sinnet, pass the working end through the final loop.

    To restore the rope to its original length, pull the end passed in the last step back through the final loop and pull on the free end. The sinnet will quickly unravel.

    As an alternative for long ropes the rope can be doubled one or more times before chaining. All one needs to do is keep hold of one end and feed throughout of the pile of rope to the other end, then start from the two conjoined ends, or then keep hold of the two ends, and feed back to the middle and then start chaining. This can be done in confined spaces or dangling in mid-air if need be, and is a common way to manage caving ropes without introducing troublesome twist.

    See also

    References

    1. Clifford W. Ashley, The Ashley Book of Knots (New York: Doubleday, 1944), 209.

    External links


    This article is adapted from “Chain sinnet” on Wikipedia, written by its contributors, and used under CC BY-SA 4.0. Text on this page is available under the same licence. Source snapshot: Wikipedia via Kiwix, 2026-07-20.
  • Sheet bend

    Sheet bend
    Sheet bend
    Names Sheet bend, Weaver’s knot, weaver’s hitch
    Category Bend
    Efficiency 48%–58%
    Related Bowline
    Typical use Joining two ropes of different diameters
    ABoK Simple: #1, #66, #1431; Double: #488, #1434; Weaver’s: #2

    The sheet bend (also known as weaver’s knot and weaver’s hitch) is a bend knot. It is practical for joining lines of different diameter or rigidity.

    It is quick and easy to tie, and is considered so essential it is the first knot given in the Ashley Book of Knots.[1] Additionally, it is one of the six knots given in the International Guild of Knot Tyers‘ Six Knot Challenge, along with the clove hitch, bowline, reef knot (square knot), round turn and two half-hitches, and sheepshank.

    The sheet bend is related in structure to the bowline; like the bowline, it has a tendency to work loose when not under load. For increased security, it is sometimes recommended that one add another turn in the smaller end, making a double sheet bend; in most cases, however, a single sheet bend should suffice. The becket hitch is another structurally similar knot.

    As a bend, its advantages lie in its simplicity and non-jamming properties.

    It is commonly taught in Scouting.

    Definition

    A sheet is a line used to trim sails. A bend is a knot used to join the ends of two lines. The “sheet bend” is mentioned in David Steel’s 1794 book Elements and Practice of Rigging and Seamanship but was used by Neolithic peoples for tying the meshes of fishing nets.[2] The name “weaver’s knot” comes from its historic use in textile mills. Even in modern operations, weavers are taught to use this particular knot when correcting broken threads in the warp.

    Method

    Sheet bend
    Steps in tying a weaver’s knot

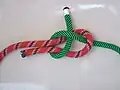
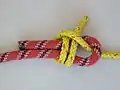
    The sheet bend may be tied by various methods: the basic “rabbit through the hole” method of forming a half hitch in the bight of the larger rope, by a more expedient method shown in Ashley as ABoK #1431 (similar to the method used by an experienced sailor or mountaineer to tie a bowline) or by a trick method (ABoK#2562), involving upsetting a noose knot over a short end of the “larger” rope. Lines of equal size may be joined with a sheet bend, but when one is larger, it plays the simpler role of the “eye” (red line shown in the infobox), rather than the half-hitch (in green)

    One type of weaver’s knot is topologically equivalent to a sheet bend, but is tied (usually in smaller stuff) with a different approach. Sheet bends are also used for netting.

    Sheet bend
    A fish net made from sheet bends

    The Ashley Book of Knots states that a left-hand sheet bend (where the two free ends are on opposite sides of the knot) is inferior to the regular sheet bend.[3]
    More recent testing on the left-hand bowline has shown that there is little difference in strength between it and the regular bowline.[4] While that research does not directly address bends, but since a bowline is a sheet bend on a bight, it does suggest that it is plausible that there is little difference in strength between the left-hand sheet bend and regular sheet bend.

    • Sheet bend
      Sheet bend
    • Left-hand sheet bend
      Left-hand sheet bend

    Double sheet bend

    When lines are of unequal diameter or rigidity it is necessary for security to “double” the sheet bend by making an additional round turn below the first and again bringing the working end back under itself. The free ends should end up on the same side of the knot for maximum strength.

    • The double sheet bend
      The double sheet bend

    Security

    A study of 8 different bends using climbing rope of equal diameter said the sheet bend was weak. In one test, it pulled apart with less than half the tension that other knots withstood. The authors recommend “2 half hitches on the bend back line and overhand knot on turn thru line.” Even with these, it was always a bottom performer and the double sheet bend did little better. However, the butterfly bend did the best.[5]

    After performing security testing, Ashley wrote with regard to the Sheet Bend: “Some readers may be surprised to find the Sheet Bend with so low a rating, but these tests were made in exceptionally slippery material. The Sheet Bend is the most practical of bends and quite secure enough for ordinary purposes.”

    See also

    References

    1. Ashley, Clifford W. (1944). The Ashley Book of Knots (PDF). Doubleday. pp. 9, 18. Archived from the original (PDF) on 19 December 2018.
    2. Shaw, John (2004). The Directory of Knots. Rochester: Grange Books. p. 35.
    3. Ashley, Clifford W. (1944). The Ashley Book of Knots (PDF). Doubleday. pp. #67 and #1432. Archived from the original (PDF) on 19 December 2018.
    4. Jan Simon; Vladimir Dekys; P. Palček (15 November 2019). “Revision of Commonly Used Loop Knots Efficiencies”. ResearchGate. pp. 413–414. Retrieved 17 September 2022.
    5. “Knot Break Strength vs. Rope Break Strength”. 15 October 2016. Archived from the original on 15 October 2016. Retrieved 27 December 2022.

    This article is adapted from “Sheet bend” on Wikipedia, written by its contributors, and used under CC BY-SA 4.0. Text on this page is available under the same licence. Source snapshot: Wikipedia via Kiwix, 2026-07-20.
  • Celtic knot

    Celtic knot
    One very basic form of Celtic or pseudo-Celtic linear knotwork.
    Celtic knot
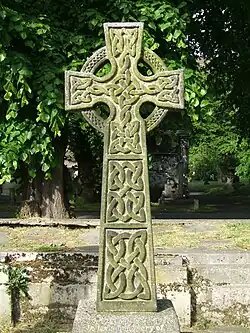
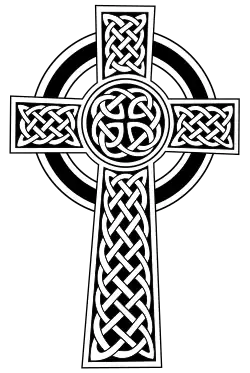
    Stone Celtic crosses, such as this, are a major source of knowledge regarding Celtic knot design.
    Celtic knot
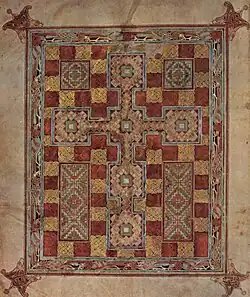
    Carpet page from Lindisfarne Gospels, showing knotwork detail.
    Celtic knot
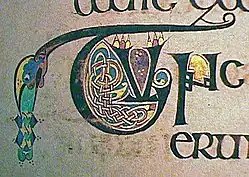
    Almost all of the folios of the Book of Kells contain small illuminations like this decorated initial.

    Celtic knots (Irish: snaidhm Cheilteach, Welsh: cwlwm Celtaidd, Cornish: kolm Keltek, Scottish Gaelic: snaidhm Ceilteach) are a variety of knots and stylized graphical representations of knots used for decoration, used extensively in the Celtic and Northumbrian styles of Insular art. These knots are most known for their adaptation for use in the ornamentation of Christian monuments and manuscripts, such as the 8th-century St. Teilo Gospels, the Book of Kells and the Lindisfarne Gospels. Most are endless knots, and many are varieties of basket weave knots.

    History

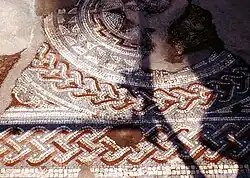
    The use of interlace patterns had its origins in the late Roman Empire.[1] Knot patterns first appeared in the third and fourth centuries AD and can be seen in Roman floor mosaics of that time. Interesting developments in the artistic use of interlaced knot patterns are found in Byzantine architecture and book illumination, Coptic art, Celtic art, Islamic art, Kievan Rus’ book illumination, Ethiopian art, and European architecture and book illumination.

    Spirals, step patterns, and key patterns are dominant motifs in Celtic art before the Christian influence on the Celts, which began around 450. These designs found their way into early Christian manuscripts and artwork with the addition of depictions from life, such as animals, plants and even humans. In the beginning, the patterns were intricate interwoven cords, called plaits, which can also be found in other areas of Europe, such as Italy, in the 6th century. A fragment of a Gospel Book, now in the Durham Cathedral library and created in northern Britain in the 7th century, contains the earliest example of true knotted designs in the Celtic manner.

    Examples of plait work (featuring designs of woven, unbroken cord) predate knotwork designs in several cultures around the world,[2] but the broken and reconnected plait work that is characteristic of true knotwork began in northern Italy and southern Gaul and spread to Ireland by the 7th century.[3] The style is most commonly associated with the Celtic lands and England (particularly the Kingdom of Northumbria) and was then exported to Europe by Irish and Northumbrian monastic activities on the continent. J. Romilly Allen has identified “eight elementary knots which form the basis of nearly all the interlaced patterns in Celtic decorative art”.[4][5]

    The Celtic knot as a tattoo design became popular in the United States in the 1970s and 1980s.[6]

    Examples

    Examples of Celtic knots
    • A small part of The Great Pavement, a Roman mosaic laid in AD 325 at Woodchester, Gloucestershire, England
      A small part of The Great Pavement, a Roman mosaic laid in AD 325 at Woodchester, Gloucestershire, England
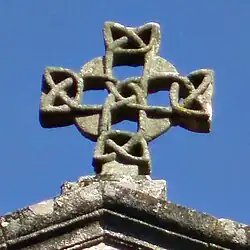
    • Romanesque cross atop the church of St. Susanna, Santiago de Compostela, Galicia
      Romanesque cross atop the church of St. Susanna, Santiago de Compostela, Galicia
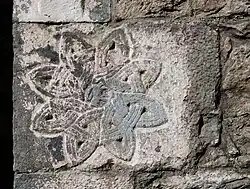
    • Cahir Abbey,  15th century
      Cahir Abbey, c.15th century
    • Design influenced by illustration in the Lindisfarne Gospels
      Design influenced by illustration in the Lindisfarne Gospels
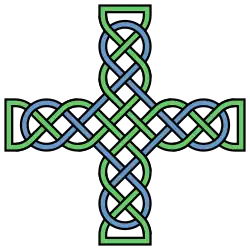
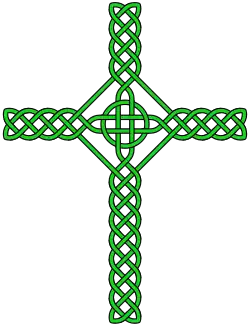
    • A basic form of a Celtic knotwork cross
      A basic form of a Celtic knotwork cross
    • Ornamental version of Celtic "high cross" with decorative knotwork
      Ornamental version of Celtic “high cross” with decorative knotwork
    • A quasi-Celtic cross made of a large symmetrical knot with a circle interlaced through its center
      A quasi-Celtic cross made of a large symmetrical knot with a circle interlaced through its center
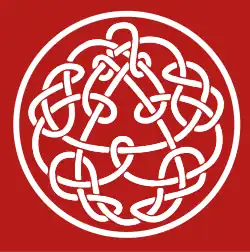
    • This knotwork by Steve Ball illustrates King Crimson's Discipline and is the logo of Discipline Global Mobile
      This knotwork by Steve Ball illustrates King Crimson’s Discipline and is the logo of Discipline Global Mobile
    • Slightly modified version of quasi-Celtic knot
      Slightly modified version of quasi-Celtic knot
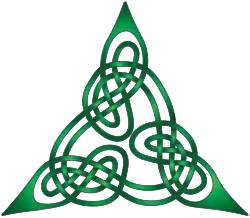
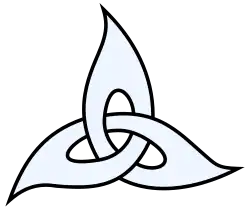
    • Triquetra knot
      Triquetra knot

    See also

    References

    1. Trilling, James (2001). The Language of Ornament. World of Art. Thames and Hudson. ISBN 978-0500203439.
    2. George Bain (1951). Celtic art: The methods of construction. London: Constable Press.George Bain (1973). Celtic Art: The Methods of Construction. Dover Publications, Inc. ISBN 0-486-22923-8.
    3. Sullivan, Sir Edward (1920). The Book of Kells (Second ed.). “The Studio” Ltd. pp. 39. ISBN 1-85170-035-8. {{cite book}}: ISBN / Date incompatibility (help)
    4. Allen, J. Romilly (1904). Celtic Art in Pagan and Christian Times. Methuen & Co. pp. 265. ISBN 1-85891-075-7. {{cite book}}: ISBN / Date incompatibility (help)
    5. Ivan, Drew (10 August 2005). “Eight Basic Knotwork Patterns”. Archived from the original on 30 January 2018. Retrieved 2007-01-10.
    6. Shapiro, Ari (25 November 2014). “The American Origins Of The Not-So-Traditional Celtic Knot Tattoo”. NPR. Archived from the original on 23 January 2019.

    External links


    This article is adapted from “Celtic knot” on Wikipedia, written by its contributors, and used under CC BY-SA 4.0. Text on this page is available under the same licence. Source snapshot: Wikipedia via Kiwix, 2026-07-20.
  • Sheepshank

    Sheepshank
    Sheepshank

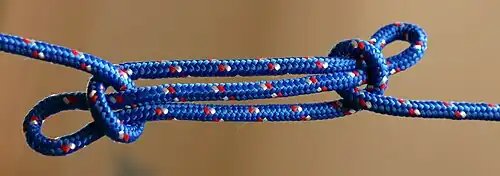
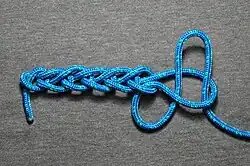
    An unloaded sheepshank tied in nylon rope
    Category Shortening
    Origin 1627[1]
    Related Catshank, Dogshank, Bell-ringer’s knot
    Releasing Non-jamming
    Typical use Provides loops, shortens or removes slack from a rope, bypasses a frayed section of rope
    Caveat Spills if not under tension
    ABoK #1152, #1153, #1154, #1158, #1159, #1160
    Instructions

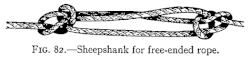
    A shank is a type of knot that is used to shorten a rope or take up slack, such as the sheepshank. The sheepshank knot is not stable. It will fall apart under too much load or too little load.

    The knot has several features which allow a rope to be shortened:

    • It provides two loops, one at each end of the knot which can be used to pass another rope through
    • The knot remains somewhat secure under tension; the coarser the rope the more secure it is (see Disadvantages, below)
    • The knot falls apart easily when tension is removed

    Construction methods

    A sheepshank knot may be constructed as follows: …

    • Pull a section of rope back and lay it alongside the rope, so that the rope forms a Z approximately 20 cm long.
    • Flatten the Z so that there are 3 sections of rope lying alongside each other, with two U-bends where the rope reverses direction.
    • At each U-bend, grasp the U-bend in one hand, thus holding two of the rope sections. With the other hand form a small loop in the remaining section and draw it over the U-bend so that the loop forms a half hitch and stays there if the free end of the rope is pulled taut.
    Many people draw the small loop over facing the wrong way at least half of the time. Instead, make with the U a half-hitch around the other part, by tucking through, then pull the U straight.
    • Repeat at the other U-bend.

    An alternative method for quickly constructing a sheepshank is as follows:

    • Create a simple loop in the rope, so that the (left) leading end is on top of the (right) trailing end of the loop.
    • Repeat this process further down the rope to create 3 total loops that overlap slightly (similar to a venn diagram with three circles).
    • Reach through the outer two loops and grab either side of the middle loop and pull outward while also keeping the rest of the rope slightly taut.
    • Once the middle loop is pulled through the outer loops, pull on the free ends of the rope to secure.

    The result is a flattened loop which is held at each end by a half hitch. If the sides of the flattened loop are pulled away from each other, the flattened loop ends pull out of the half hitches and the knot falls apart, but if the free ends
    are pulled taut then the knot remains secure.

    Modern usage

    Sheepshank knots are typically used for securing loads to trucks or trailers, and in sailing applications.

    Disadvantages

    The sheepshank was developed before the use of modern “slippery” synthetic ropes. Constructed from such ropes, under load, it can fail. It is strongly advised that an alternative knot be used.

    Variants

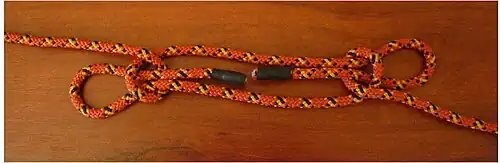
    Man-o’war sheepshank

    The man-o’war sheepshank is a sheepshank knot with a Handcuff knot in the middle. This configuration with the half-hitches formed close to the central knot is used in rope rescue and is called a Fireman’s chair knot.

    Sheepshank

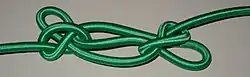
    Sheepshank with Marlinespike hitches

    This version of the sheepshank is tied by using slipknots instead of half-hitches. It is one of the safest sheepshank variations.[2]

    Kamikaze knot

    Sheepshank

    The kamikaze knot is a slight variant of the sheepshank. To perform a kamikaze knot, a sheepshank is first constructed. While holding sufficient tension on the sheepshank so it will not slip out, the middle rope is sliced. This allows climbers rappelling down cliff faces to keep most of the rope used for the rappel, by tying the knot at the top, and shaking the rope when they reach the bottom. The shaking disconnects the knot at the top, allowing the longer section of rope to fall, meaning only a small amount of rope is retained by the anchor at the top of the cliff. Thin or slippery rope is unsuitable for such a knot, as it can easily slip, and the knot should not be performed unless desperately needed.

    Use

    This variant of the sheepshank knot appeared in an episode of the TV show Man vs. Wild. Although certainly not invented by him, Bear Grylls uses a modification of this knot by cutting one of the lengths of rope in the knot, while rappelling down an edge during the Ireland episode of Man Vs Wild in order to retrieve his rope at the bottom by severing the middle leg of the sheepshank knot before his descent. He refers to it as a “Kamikaze” knot.

    Bell-ringer’s knot

    A simpler variant of the sheepshank wherein a half-hitch is only tied around only one end produces a bell-ringer’s knot (ABoK #1147). It will immediately spill under tension, and is used to keep a long rope from the belfry deck when not in use.

    Catshank

    Catshank
    Sheepshank
    Category Shortening
    Related Sheepshank, Dogshank

    The catshank is a variant of the sheepshank, clinched by two overhand knots with the bights passed through the twists (one end of the rope must be available to tie the overhands).[3]

    Dogshank

    Dogshank
    Sheepshank
    Category Shortening
    Related Sheepshank, Catshank, Bowline
    Typical use Shortening rope

    The dogshank, or sheepshank pouch knot, is a variant of the sheepshank where the eyes formed at each end have the ends of the rope passed through them to prevents the knot from spilling. At least one end of the rope must be available to tie or untie this knot. It is mostly useful for the hammock-like space it creates.[4]

    The dogshank can be thought of as two opposite bowlines where

    • the two ends provide the respective standing lines each with its pinching turn, and
    • the two elbows of the Z-folded middle part provide the bights that pass through the turns and come back from around the standing lines.

    Further reading

    See also

    References

    1. “knot, hitch, and splice :: Sheepshank – Britannica Student Encyclopaedia”. Archived from the original on 2006-01-18. Retrieved 2006-11-11.
    2. Ashley, Clifford W. (1944), The Ashley Book of Knots, New York: Doubleday, p. 210
    3. Graumont, Raoul (1945) Handbook of Knots. New York, Cornell Maritime Press, page 20
    4. Sheepshank & Variants knots.neocities.org, accessed 26 August 2023

    External links


    This article is adapted from “Sheepshank” on Wikipedia, written by its contributors, and used under CC BY-SA 4.0. Text on this page is available under the same licence. Source snapshot: Wikipedia via Kiwix, 2026-07-20.
  • Celtic button knot

    Celtic button knot
    Celtic button knot

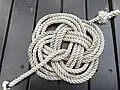
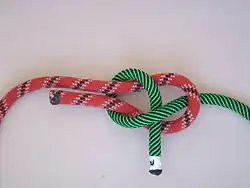
    Celtic button knot double pass version, both flat and tightened
    Category Stopper
    Category 2 Decorative
    Related diamond knot, Chinese button knot
    ABoK #545

    A Celtic button knot is a stopper knot on a single rope that results in a spherical decorative knot with hair braid / basket weave pattern.[1] It is essentially a single strand Turk’s Head Knot that is structured such a way that it is effectively tied around the rope itself, creating a stopper. It typically is used as a button, or as a knot securing the end of the rope from fraying.

    Tying

    Celtic button knot
    Celtic button knots 4 steps; RB: two overhand loops, RT: third loop: over-under-over-under, LT: fourth loop: over-under-under-over, LB: tightened

    There are 4 main steps to tying the Celtic knot:

    1. two consecutive overhand loops, the last one placed partially over the first forming two petals of a four petal flower
    2. left end woven from right horizontally through the loops; over, under, over, under forming the third petal
    3. left end woven again from left: over the edge, under, under, over and up through the central hole finishing the four petal flower
      1. optional: pushing the end again into the knot following the main part consistently on the inside. This may be repeated to give volume to the knot
    4. tightening evenly to close the petals of the flower forming a sphere around the main part
    • Step one of tying a Celtic Button knot is a simple loop
      Step one of tying a Celtic Button knot is a simple loop
    • Step two of tying a Celtic Button knot is another loop
      Step two of tying a Celtic Button knot is another loop
    • Step three of tying a Celtic Button knot end woven into loops
      Step three of tying a Celtic Button knot end woven into loops
    • Step four: the end goes over the edge line, and under until the middle
      Step four: the end goes over the edge line, and under until the middle
    • Optional second pass-step one: follow the first pass on the inside
      Optional second pass-step one: follow the first pass on the inside
    • Optional second pass-step two: follow the first pass on the inside
      Optional second pass-step two: follow the first pass on the inside
    • Optional second pass-final step of tying a Celtic Button knot done
      Optional second pass-final step of tying a Celtic Button knot done
    • Optional third pass-final step of tying a Celtic Button knot done
      Optional third pass-final step of tying a Celtic Button knot done
    • Tightening step of tying a 3 pass Celtic Button knot
      Tightening step of tying a 3 pass Celtic Button knot
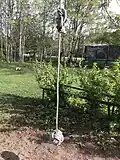
    • A 3 pass Celtic Button knot as seat of a rope swing
      A 3 pass Celtic Button knot as seat of a rope swing
    • Celtic Button knot on the bight therefore double, flat, with loop
      Celtic Button knot on the bight therefore double, flat, with loop
    • Celtic Button knot on the bight therefore double, tightened, with loop
      Celtic Button knot on the bight therefore double, tightened, with loop

    References

    1. “How to tie a Celtic button knot”. Paracord guild. 18 April 2014. Retrieved 1 March 2026.

    This article is adapted from “Celtic button knot” on Wikipedia, written by its contributors, and used under CC BY-SA 4.0. Text on this page is available under the same licence. Source snapshot: Wikipedia via Kiwix, 2026-07-20.
  • Sennit

    Sennit
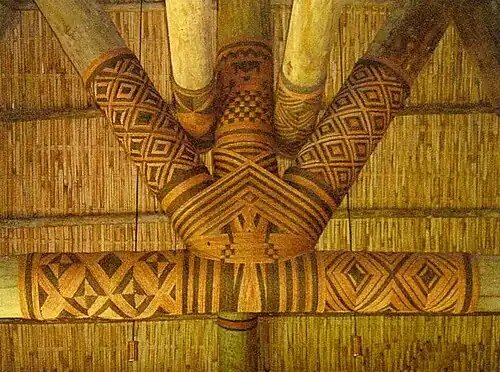
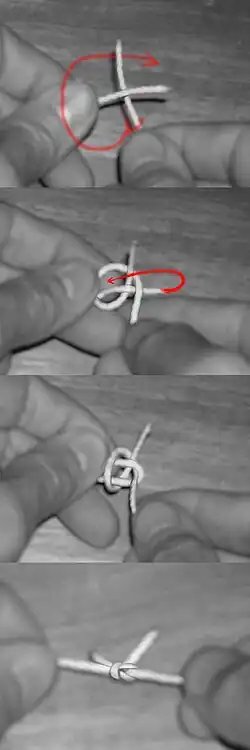
    Magimagi sennit of Fiji around wooden ceiling posts.

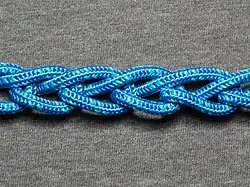
    Sennit is a type of cordage made by plaiting rope fibres or strands of dried fibre or grass. In western European nautical traditions, it was used to make flat plaited straps for use aboard ship.[1] It can be used ornamentally in crafts, like a kind of macramé, or to make straw hats. Sennit is an important material in the cultures of Oceania, where it is used in traditional architecture, boat building, fishing and as an ornamentation.[2]

    Oceania

    Sennit
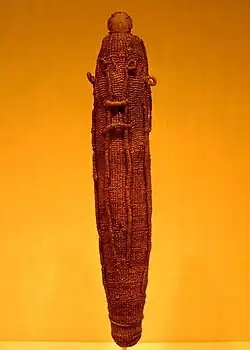
    A sacred god figure wrapping in sennit for the Tahitian war god ‘Oro.
    Sennit
    Polynesian ceremonial stone adze (toʻi or toki in Polynesian languages) lashed in sennit around the blade with carved handle, 1891-1892

    Tonga

    Sennit in Tonga is called kafa.

    Fiji

    The Fijian term used is magimagi, a craft product of the Fiji Islands.

    Hawai’i

    The term is also used in Hawaii and throughout Polynesia for cordage made by braiding the fibers of coconut husks. It was important in attaching the ʻama (outrigger float) via the iako (spars) to the hull of canoes, stones to war-club handles, erecting hale (houses), etc.[3]

    Samoa

    In the Samoan language, sennit is called ʻafa. It was used as cordage in the construction of traditional Samoan architecture, boat building with many other functional uses. ʻAfa is handmade from dried coconut fibre from the husk of certain varieties of coconuts with long fibres, particularly the niuʻafa (afa palm).[4]

    Sennit is mentioned in Robert Gibbings’ book Over the Reefs (1948).[5] He refers to its use in Samoa in 1946, where he was able to observe its being made on many occasions. He notes that its crafting was a constant occupation in Samoan villages, because so much of the material was required. A significant quote from the book, made by a village chief to Gibbings, emphasises the importance of sennit in Samoan culture: “In your country,” said a chief to me, “only a few men can make nails, but in Samoa, everyone can make nails” (p. 118). He was referring to the sennit that is used to bind the structures or huts in which they lived. Sennit had a variety of other uses, including in shark fishing, where it was used as a noose that was placed over the shark’s head as it came alongside the canoe.

    “They showed me the sennit noose they had used—five years old and as good as new. They said it would last another five years if cared for.” Robert Gribbings.

    See also

    References

    1. “Oxford English Dictionary”. oed.com. Retrieved 14 April 2025.
    2. Hiroa, Te Rangi (1964). Vikings of the Sunrise. Christchurch: Whitcombe and Tombs. p. 27. Retrieved 21 August 2010.
    3. Baybayan, Chad (2012). “Plants and Tools Used for Building Canoes”. Hawaiian Voyaging Traditions. Polynesian Voyaging Society.
    4. Grattan, F.J.H. (1985). An Introduction to Samoan Custom. New Zealand: R. McMillan. pp. 164, 165. ISBN 0-908712-13-8. Retrieved 14 August 2010.
    5. Gibbings, Robert (1948). Over the Reefs and Far Away. London: J.M. Dent & Sons Ltd. OCLC 1100883.

    This article is adapted from “Sennit” on Wikipedia, written by its contributors, and used under CC BY-SA 4.0. Text on this page is available under the same licence. Source snapshot: Wikipedia via Kiwix, 2026-07-20.
  • Cat’s paw (knot)

    Cat’s paw
    Cat's paw (knot)
    Category Hitch
    Origin Ancient
    Related girth hitch, lark’s foot, cow hitch
    Releasing Non-jamming
    Typical use Attaching a rope to a hook or ring
    ABoK #1891

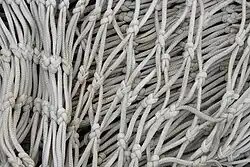
    The Cat’s paw is a knot used for connecting a rope to an object. It is very similar to the cow hitch except there is an additional twist on each side of the bight, making it less prone to slipping.

    The cat’s-paw is the common hook hitch for slings. It is the same basic form as the bale sling hitch but has additional twists. Brady says “two or three altogether”, and Steel, who mentioned the name in 1794, says “three twists”. It is the best of all sling hitches and is often recommended for a slippery rope. But no hitch can slip when tied in a slings since it has no ends. All that is needed is a hitch that cannot jam, and this requirement the cat’s-paw fills admirably. The knot spills instantly when removed from the hook. It is the hitch always used for heavy lifts.

    Uses

    • Attaching a sling (a rope that has been formed into a continuous loop) to a hook

    Comments

    The knot balances the load between the two halves of the hitch, and is used in wharfs and docks. If one half fails, the other should hold until the load can be safely and swiftly lowered to the ground.

    When the sling is long the knot can be pre-formed in anywhere in it, then slid over the end of a hook or post.

    Structure

    Formed from a bight turned up over itself (like a girth hitch) but with extra twists on each side to achieve the desired friction.

    Tying

    Method 1

    Form a bight in the middle of the line, and pull it back over itself like a girth hitch. This forms two loops, turned in opposite directions. Convert each loop into an elbow by adding a twist in the direction that will tend to tighten them (the wrong direction will undo the loop completely). Pass both elbow over the hook, rail or post and pull tight, taking care to push the bight up snugly against the turns.

    Method 2

    If working end of the line has an eye in it, and the standing end is accessible, the knot can be tied to a closed ring, another eye, or a rail with inaccessible ends, as follows. Pass the eye around the ring or rail, then pass the standing end through its own eye (this effectively forms a girth hitch). Then pass the standing end through the eye again, and pull up tight, taking care to push the bight up snugly against the turns.

    When using the cat’s paw to join two eyes, this process may be repeated several times to give several turns – as many as five in a fine fishing monofilament. Then when tightened, instead of pulling the bight up against the turns, both eyes are pulled equally, to make neat coils of turns in both eyes, meeting halfway between them.

    See also

    References

    1. Ashley, Clifford W. (1944). The Ashley Book of Knots, p. 546. Doubleday. ISBN 0-385-04025-3.

    External links


    This article is adapted from “Cat's paw (knot)” on Wikipedia, written by its contributors, and used under CC BY-SA 4.0. Text on this page is available under the same licence. Source snapshot: Wikipedia via Kiwix, 2026-07-20.