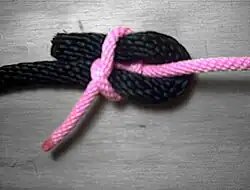
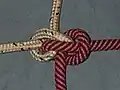
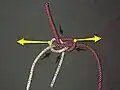
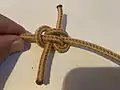
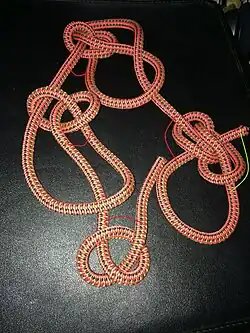
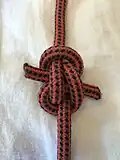
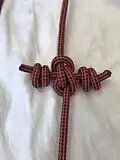
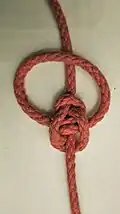
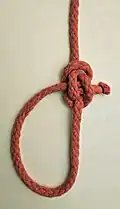
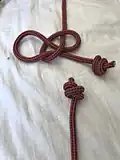
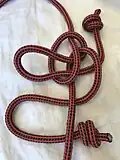
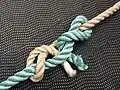
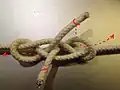
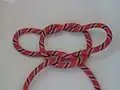
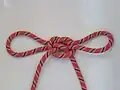
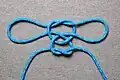
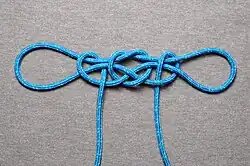
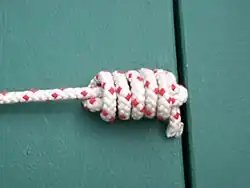
A heaving line knot[1] is a family of knots which are used for adding weight to the end of a rope, to make the rope easier to throw. In nautical use, a heaving line knot is often tied to the end of a messenger line, which is then used for pulling a larger rope, such as a hawser. There are several distinct knots which all share the common name, heaving line knot.[1] The monkey fist is a well-known heaving line knot.
Tying Heaving line knot
Tying Stopper knot
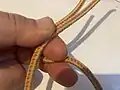
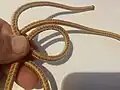
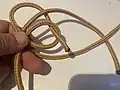
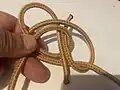
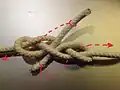
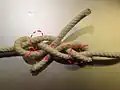
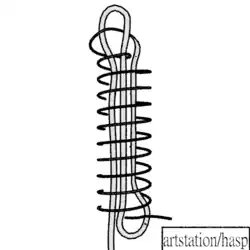
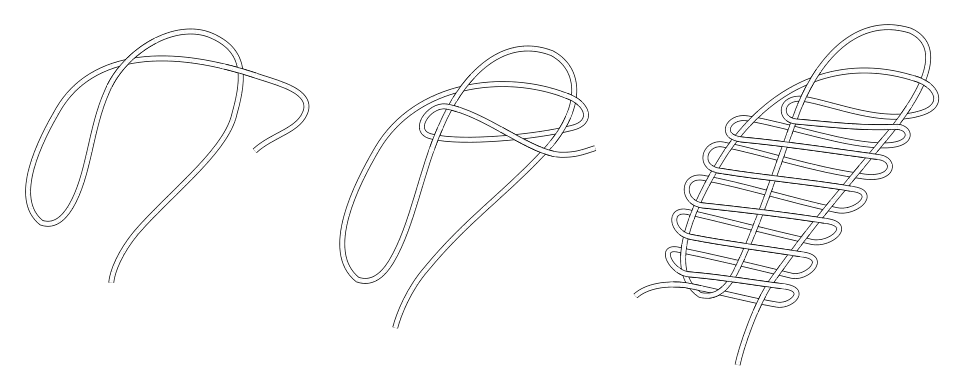
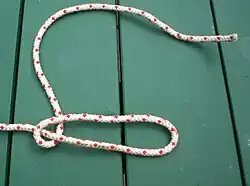
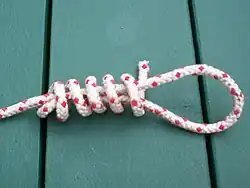
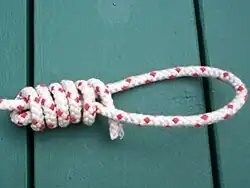
Make a bight in the tail end of the rope. Wrap the working end around the tail toward the bight end, with multiple turns. Complete the knot by passing the tail end through the bight loop.
Make a bight
Wrap the working end around
Put the end through the bight
Tighten by pulling on the standing part to close the bight
123Budsworth, Clifford W. Ashley, with amendments by Geoffrey (1993). The Ashley book of knots. New York: Doubleday. p.88. ISBN9780385425544.{{cite book}}: CS1 maint: multiple names: authors list (link)
↑Des Pawson. Handbook of Knots, 2004 — ISBN 1-4053-0467-7
↑Des Pawson. Handbook of Knots, 2004 — ISBN 1-4053-0467-7
123Owen Peter (1993) knots. p14. ISBN9781561382255“
This article is adapted from “Heaving line knot” on Wikipedia, written by its contributors, and used under CC BY-SA 4.0. Text on this page is available under the same licence. Source snapshot: Wikipedia via Kiwix, 2026-07-20.
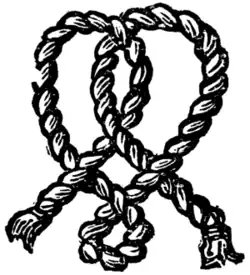
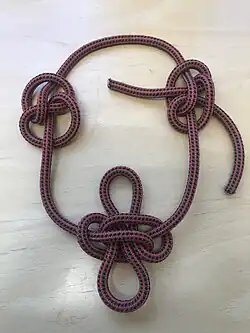
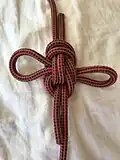
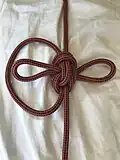
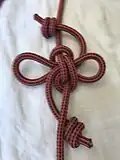
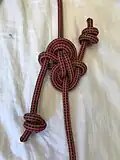
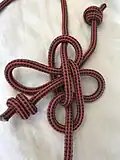
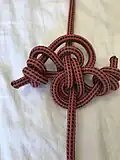
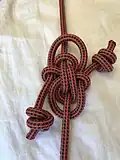
The Heneage knot is a decorative heraldic knot,[1] the badge of the Heneage family of Lincolnshire, England.[2] It was awarded to Sir Thomas Heneage by Queen Elizabeth I in 1594.
References
↑Charles Boutell, English heraldry. With 450 illus. drawn and engraved on wood by R.B. Utting, Cassell, Petter & Galpin, 1867, p. 131
This article is adapted from “Heneage knot” on Wikipedia, written by its contributors, and used under CC BY-SA 4.0. Text on this page is available under the same licence. Source snapshot: Wikipedia via Kiwix, 2026-07-20.
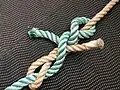
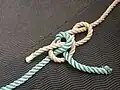
The heaving line bend is a knot for securely joining two ropes of different diameter or rigidity. It is often used to affix playing strings to the thick silk eyes of an anchorage knot in some stringed instruments. In nautical use, the heaving line bend is used to connect a lighter messenger line to a hawser when mooring ships. It is knot number 1463 in The Ashley Book of Knots,[1] and appeared in the 1916 Swedish knot manual Om Knutar.[2]
The heaving line bend is similar to the sheet bend and the racking bend, and may be used to pass a thick rope to a distant receiver by first throwing the end of a thinner rope which may be weighted with a monkey fist or a heaving line knot.
Tying steps
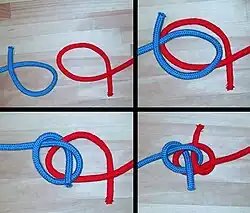
The heaving line bend is tied the same way as the sheet bend with one difference: the final crossing of the thin end is done in the opposite direction, so the thin end points away from the thin line, essentially in the same direction as the thick end, towards the thick line. This avoids jamming when the thin line is pulled to carry the thick end out of reach.
This article is adapted from “Heaving line bend” on Wikipedia, written by its contributors, and used under CC BY-SA 4.0. Text on this page is available under the same licence. Source snapshot: Wikipedia via Kiwix, 2026-07-20.
A zeppelin bend (also known as the Rosendahl Bend) is an end-to-end joining knot formed by two symmetrically interlinked overhand knots. It is stable, secure, and highly resistant to jamming.[1] It is also resistant to the effects of slack shaking and cyclic loading.
Front view
Back view
Loosening / untying
History
The name “Zeppelin” was given to this knot in a Boating (1976 March) article by editors Bob & Lee Paine, ostensibly reporting the testimony of someone claiming knowledge of the knot’s history in the US Navy. The article asserts that then Commander Charles Rosendahl, commander of the airship Los Angeles, insisted that only this knot was to be used in joining airship ropes. However, in a note to a newsletter editor seeking permission to re-publish their article, Lee Paine wrote that then-retired Vice Admiral Rosendahl commented on the Boating article to say that he knew nothing of the knot (and he also corrected where airship training occurred). Giles Camplin, a student of airships, notes that a rolling hitch (#1735) is a more likely method used by ground handlers to join ropes. Other historical sources show that a ‘toggle’ was used to connect mooring lines with fixed eye splice terminations. Camplin’s report was published in issue #60 of ‘Dirigible’ in 2010. In a small publication, Potomac Caver, Bob Thrun published his discovery in 1966, calling it (his article title) simply ‘An easily untied bend’.[2] Bob Thrun was well known in the caving community as fastidious for details in mapping caves.
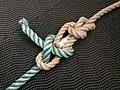
ABOK#582 to the left, Zeppelin bend to the right, ABOK#582 with folded central section below in the middle
Although some users regard (what might be better named) “Thrun’s Joint” as a nearly ideal rope joining knot,[3][4] it is not very well known; it is not added into the (1944) The Ashley Book of Knots (although “Hunter’s/Rigger’s” bend was added ca. 1983).
Tying
Zeppelin bend step by step
Fundamentally, the zeppelin bend is formed from two superposed loops of opposite chirality. This is in contrast to the rigger’s bend (AKA Hunter’s bend, #1425A) which is formed from two inter-linked loops of the same chirality.
Chirality refers to the “handedness” of the loop, which can be either left (designated “S”) or right (designated “Z”). The chirality of a loop cannot be changed by flipping or turning it over – in the same way, a left shoe cannot be transformed into a right shoe by flipping or turning it over (it is always a left shoe).
The zeppelin bend is difficult to tie while ropes are under tension (which is further obvious evidence that it wasn’t used with mooring lines during ground handling of airships). In fact, with any ‘end-to-end joining knot’ (i.e. bend), existing tension in the ropes makes the tying process extremely difficult (if not impossible). The zeppelin is therefore tied with two loose ends (i.e. no existing tension) ending with a simple knot on each, but woven to each other in a pattern specific to zeppelin. Butterfly bend, Hunter’s bend, and Ashley’s bend also weave one simple knot on either end but use their own different patterns.
Ends held together, inner main part forward
Outside end bent out and over both ropes
Outside end under both ropes and up through own loop
Inner end under inner main part, and through loops along outside end
Tighten by pulling opposite ends and main parts.
Form a loop in each of the ends of rope (one loop must be “S” and the other must be “Z” chirality)
Superpose (overlay) one loop over the other, orienting each loop so that both working ends face outwards/away from the central overlap.
Feed each working end though the central overlap of the two loops, ensuring that each working end goes in opposite directions.
Dress and set the knot by sequentially pulling on all four rope segments.
To untie, loosen the collars that form around each Standing Part (SPart).
Zeppelin bend forming a loop: the four stages of the method starting with a “clover leaf” or flattened overhand knot; Red line: ends of the overhand knot, Green line: ends of the underhand
Another method of remembering this knot is to visualize a “69”. To tie the knot with this method, follow the steps below:
Make a “6” with one line (rope) end. It is important that the working end (the free, short end) winds up on top of the standing end for the “6”.
Make a “9” with the other line end. Make sure that the working end (the free, short end) winds up on the bottom of the standing end
While keeping the 6 and the 9 intact, place the “6” over the “9”, with the holes of each number lining up, making absolutely sure the working ends are on opposite sides of the holes, and both working ends are outside, not in between the standing ends.
wrap the “tail” of the “6” first down, around both lines/hole edges, and up through the middle (circle) part of your “69”.
wrap the “tail” part of the “9” up, around both lines/hole edges, and down through the middle (circle) part of your “69”, it should pass along to the other working end in the opposite direction.
Pull each standing end while ensuring that the working ends are not pulled back out from the “69” holes to tighten. Pull each working end to tighten even more.
Variants
Simplest and therefore the slimmest version of Zeppelin bend
Zeppelin bend where the ends are secured with a stopper knot each
Zeppelin bend tied with bights creating two fixed loops protruding from the knot core
Zeppelin bend on bight with three very reliable fixed loops at the knot
Double slipped zeppelin bend with stopper knots at the ends
Double slipped zeppelin bend with slips locked using the knotted ends
Zeppelin knot—the working ends on the bend version create a bight/loop on the knot version
Every end-to-end joining knot, or ‘bend’, has four corresponding eye knots.
The usual method of creating an eye knot from a bend is by linking a tail with a Standing Part (SPart). Eye knots formed by linking of the two tails or the two SParts are usually of less utility due to the loading profile thus created.
The Zeppelin loop is quite useful and is also jam resistant, being formed by linking a tail to an SPart.
An example of a Zeppelin loop is found at this website: https://knots.neocities.org/zeppelinloop.html
Slipped
Having on both ends, an elbow of the end rather than the end itself, cross the knot center, gives a single or double slipped version. It is still easier to untie by pulling the opposing bridges away from each other rather than by pulling the slipped end(s). The slipped Zeppelin bend can also be locked by pushing ends respectively through the eye of its own slip on the opposite side.
Tying the slipped version: starting with a simple slip knot on one of the standing parts
Weaving in the start of a symmetrical simple slip knot with the end of the other standing part
finalizing the symmetrical simple slip knot with a bight at the end of the other standing part
Tightening the double slipped zeppelin bend, by pulling the standing parts and the slips
locking the double slipped zeppelin bend, each slip locked with its own end
Tightening the locked slips of the double slipped zeppelin bend
Double slipped zeppelin bend with slips locked using the knotted ends pulled tight
Tied with bights
If instead of two ends, one forms two bights of the same rope, then three reliable loops are created; a loop at each of the two bights, and a third formed by the rope section connecting the two bights. These versions also have the same advantage with less curvature nearest the main ropes, thus having a higher break strength and being as easy to untie. This is also a way to shorten the rope, and/or to isolate up to three weak rope sections near each other.
This article is adapted from “Zeppelin bend” on Wikipedia, written by its contributors, and used under CC BY-SA 4.0. Text on this page is available under the same licence. Source snapshot: Wikipedia via Kiwix, 2026-07-20.
The harness bend is a general purpose bend knot used to join two ropes together. The knot can be tied under tension and will not capsize.[1][2]
Tying
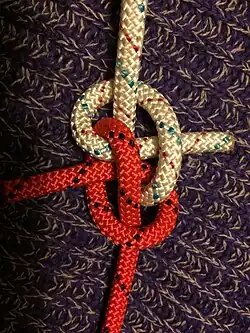
The harness knot is essentially one half hitch and one crossing hitch each made by one of the two joined ropes, around the other ropes body. The ends get caught in between the two ropes and these two hitches, at the elliptical eye in the middle of the knot.
There are two other variants to this bend: a double harness bend with ends pointing in opposite directions, and a double harness bend with parallel ends i.e. with ends pointing in the same direction. The starting side of one of the hitches has to be different, in order to have the ends approach the elliptical eye in the middle, from the prescribed direction.
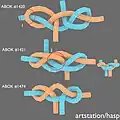
Double harness bend ABOK #1420 – untightened
Double harness bend with parallel ends ABOK #1421 – untightened
2 – sometimes ends are crossed, sometimes are not – like in abok 1420
Relationship to other knots
The double harness bend is an unfinished Fisherman’s knot (or even a Double fisherman’s knot): the end needs to go through its own half hitch (twice) to form a (double) overhand knot.
The double harness bend is an unfinished Blood knot: The half hitches need to take one or several turns around both ropes before going through the eye in the middle.
The double harness bend with parallel ends is an unfinished Reever knot: The ends need to go through the opposite half hitch, to be lined up with its own rope body.
All these knots are more secure than the harness knot but they are not as easy to untie.
From double harness bend ABOK #1420 to Fishermans bend: ends through own half hitch
From double harness bend ABOK #1420 to Blood knot: ends take full rounds around both ropes before the half hitch
From double harness bend with parallel ends ABOK #1421 to Reever bend: ends through opposite half hitch
Use
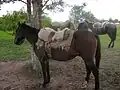
The harness bend is useful when one needs to tighten the slack in a binding loop before locking the knot in the tight position. The name probably comes from the use in fixing the saddle on the back of the horse, tightening as soon as the horse that has learned to inhale at first move, exhales.
In situations where a more professional quick and secure packing is required, it may be more proper not to tie a harness bend starting with a crossing hitch and locking with a half hitch, but another more reliable combination of loop to tighten in, and hitch to lock with, such as these:
This article is adapted from “Harness bend” on Wikipedia, written by its contributors, and used under CC BY-SA 4.0. Text on this page is available under the same licence. Source snapshot: Wikipedia via Kiwix, 2026-07-20.
The hangman’s knot[1] or hangman’s noose[2] (also known as a collar during the Elizabethan era) is a knot most often associated with its use in hanging a person.
Function
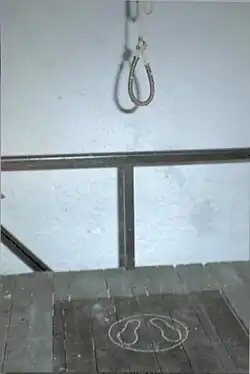
This knot was typically used as a method of capital punishment. The pull on the knot at end of the gallows often resulted in a cervical fracture. Another method intended to result in the mass of the knot crushing closed (occluding) neck arteries, causing cessation of brain circulation, which was not always rapid. The knot is non-jamming but tends to resist attempts to loosen it.
In culture
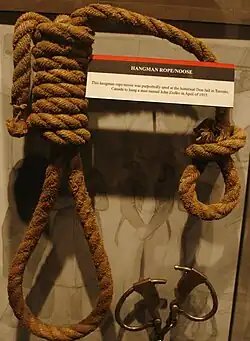
Hangman’s rope displayed at the National Museum of Crime & Punishment, Washington, D.C. A label with the title “Hangman Rope/Noose” shown attached to the noose reads, “This hangman rope/noose was purportedly used at the historical Don Jail in Toronto, Canada to hang a man named Jan Ziolko in April of 1915.”The gallow was in use in the old jail in Jerusalem during the British mandate.
Surviving nooses in the United Kingdom show simple slipknots that were superseded in the late 19th century with a metal eye spliced into one end of the rope, the noose being formed by passing the other end through it. The classic hangman’s knot was largely developed in the United States. Filmed hangings of war criminals in Europe after World War II, conducted under US jurisdiction, show such knots placed in various locations.
Each additional coil adds friction to the knot, which makes the noose harder to pull closed or open. When Grover Cleveland was the sheriff of Erie County, he performed two hangings. Cleveland was advised by a more experienced Sheriff to grease the rope with tallow and run it through the knot a few times to ensure rapid closure with the drop. The number of coils should therefore be adjusted depending on the intended use, the type and thickness of rope, and environmental conditions such as wet or greasy rope. One coil makes it equivalent to the simple running knot.
Woody Guthrie sings of the hangman using thirteen coils:[3]
Did you ever see a hangman tie a hangknot?
I’ve seen it many a time and he winds, he winds,
After thirteen times he’s got a hangknot.
This article is adapted from “Hangman's knot” on Wikipedia, written by its contributors, and used under CC BY-SA 4.0. Text on this page is available under the same licence. Source snapshot: Wikipedia via Kiwix, 2026-07-20.
A handcuff knot is a knot tied in the bight having two adjustable loops in opposing directions, able to be tightened around hands or feet. The knot itself does not possess any inherent locking action, and thus is not as easy to use for such purposes as the name might suggest.
The knot is also known as a hobble knot for similar reasons, from the idea that the knot was sometimes used on the legs of horses to limit the distance their riders had to walk in the morning to retrieve them.
Method
1. Two loops
2. Pull through
3. Tighten
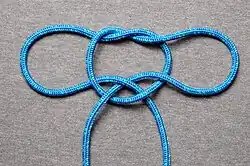
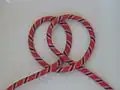
The knot consists of two simple loops, overlaid, and with the ends pulled through. At that stage, the knot is slippery and easy to adjust. The knot can be “locked” by making one or more overhand knots with the loose ends in the manner of a square knot.[1]
The sizes of the two loops can also be fixed by making half hitches with each end over the necks of the loops. This configuration is known as the fireman’s chair knot.
This article is adapted from “Handcuff knot” on Wikipedia, written by its contributors, and used under CC BY-SA 4.0. Text on this page is available under the same licence. Source snapshot: Wikipedia via Kiwix, 2026-07-20.
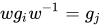
In mathematics, especially in knot theory, a Wirtinger presentation is a finite presentation where the relations are of the form where is a word in the generators, Wilhelm Wirtinger observed that the complements of knots in 3-space have fundamental groups with presentations of this form.
Preliminaries and definition
A knot is an embedding of the circle in three-dimensional space . (Alternatively, the ambient space can also be taken to be the three-sphere , which does not make a difference for the purposes of the Wirtinger presentation.) The open subspace which is the complement of the knot, is the knot complement. Its fundamental group is an invariant of the knot in the sense that equivalent knots have isomorphic knot groups. It is therefore interesting to understand this group in an accessible way.
A Wirtinger presentation is derived from a regular projection of an oriented knot. Such a projection can be pictured as a finite number of (oriented) arcs in the plane, separated by the crossings of the projection. The fundamental group is generated by loops winding around each arc. Each crossing gives rise to a certain relation among the generators corresponding to the arcs meeting at the crossing.
Wirtinger presentations of high-dimensional knots
More generally, co-dimension two knots in spheres are known to have Wirtinger presentations. Michel Kervaire proved that an abstract group is the fundamental group of a knot exterior (in a perhaps high-dimensional sphere) if and only if all the following conditions are satisfied:
The abelianization of the group is the integers.
The 2nd homology of the group is trivial.
The group is finitely presented.
The group is the normal closure of a single generator.
Conditions (3) and (4) are essentially the Wirtinger presentation condition, restated. Kervaire proved in dimensions 5 and larger that the above conditions are necessary and sufficient. Characterizing knot groups in dimension four is an open problem.
Examples
For the trefoil knot, a Wirtinger presentation can be shown to be
Rolfsen, Dale (1990), Knots and links, Mathematics Lecture Series, vol.7, Houston, TX: Publish or Perish, ISBN978-0-914098-16-4, section 3D
Kawauchi, Akio (1996), A survey of knot theory, Birkhäuser, doi:10.1007/978-3-0348-9227-8, ISBN978-3-0348-9953-6
Hillman, Jonathan (2012), Algebraic invariants of links, Series on Knots and Everything, vol.52, World Scientific, doi:10.1142/9789814407397, ISBN9789814407397
Livingston, Charles (1993), Knot Theory, The Mathematical Association of America
This article is adapted from “Wirtinger presentation” on Wikipedia, written by its contributors, and used under CC BY-SA 4.0. Text on this page is available under the same licence. Source snapshot: Wikipedia via Kiwix, 2026-07-20.
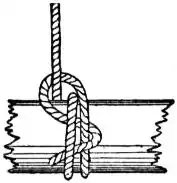
Studding-Sail Bend[2] is a way to attach the end of a rope at right angle to a cylindrical object such as a beam.
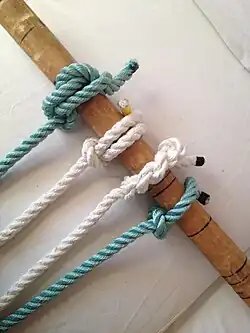
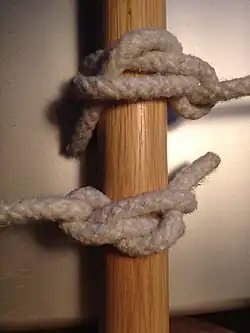
Halyard bend (upper left), timber hitch (lower right)Halyard bend
Tying
wrap the end two or more times around the object
make the end hook around the standing part and under all wrappings, to come out by the last wrap
make the end turn back and cross over the wrappings, to tuck/pass it under the first wrap
Halyard bend may be considered to be the “double-loop-around, and single-tuck-under” version of timber hitch which itself is usually tied as “single-loop-around, and double-tuck-under”.
↑Ashley, Clifford W. (1944). The Ashley Book of Knots, Doubleday, p.291, #1678 ISBN 0-385-04025-3
External links
This article is adapted from “Halyard bend” on Wikipedia, written by its contributors, and used under CC BY-SA 4.0. Text on this page is available under the same licence. Source snapshot: Wikipedia via Kiwix, 2026-07-20.
When the values of c2 and j3, for knots of a given fixed crossing number, are used as the x and y coordinates of a scatter plot, the points of the plot appear to fill a fish-shaped region of the plane, with a lobed body and two sharp tail fins. The region appears to be bounded by cubic curves,[2] suggesting that the crossing number, c2, and j3 may be related to each other by not-yet-proven inequalities.[1]
This shape is named after Simon Willerton,[1] who first observed this phenomenon and described the shape of the scatterplots as “fish-like”.[3]
12Dunin-Barkowski, P.; Sleptsov, A.; Smirnov, A. (2013), “Kontsevich integral for knots and Vassiliev invariants”, International Journal of Modern Physics A, 28 (17): 1330025, arXiv:1112.5406, Bibcode:2013IJMPA..2830025D, doi:10.1142/S0217751X13300251, MR3081407. See in particular Section 4.2.1, “Willerton’s fish and families of knots”.
This article is adapted from “Willerton's fish” on Wikipedia, written by its contributors, and used under CC BY-SA 4.0. Text on this page is available under the same licence. Source snapshot: Wikipedia via Kiwix, 2026-07-20.
 Make a bight
 Wrap the working end around
 Put the end through the bight
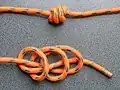 ABOK #2203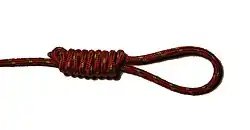
 ABOK #427